
Clothes Airer Hanger Extension
Another domestic problem, another opportunity to solve it with a disproportionate amount of time and energy. At least it keeps me out of trouble!
Problem
I impulsively bought a compact Clothes Airer while out shopping recently. Since our unit is particularly small and we don’t have an outdoor clothes line or clothes dryer, our living room in winter is forever crowded by drying laundry.

The aforementioned impulse purchase
Solution
At some point, I realised that the bulk of our laundry was hung on coat hangers and if I added a hanger to the slimline airer, I could dry a whole load of washing without taking up half of our living room!
Pictured below and left, the original airer manages to block half of the door to the kitchen while taking up considerable floor space. It’s still a great airer because it can take a lot of washing and is rather sturdy, but it’s more effective used outside in summer.
On the right is the new airer with hanger attachment. An additional and unforeseen benefit to this new design is that the clothes on coat hangers hang perpendicular to the wall behind, with part of each item hanging over the wall heater ensuring the dry faster and more evenly.
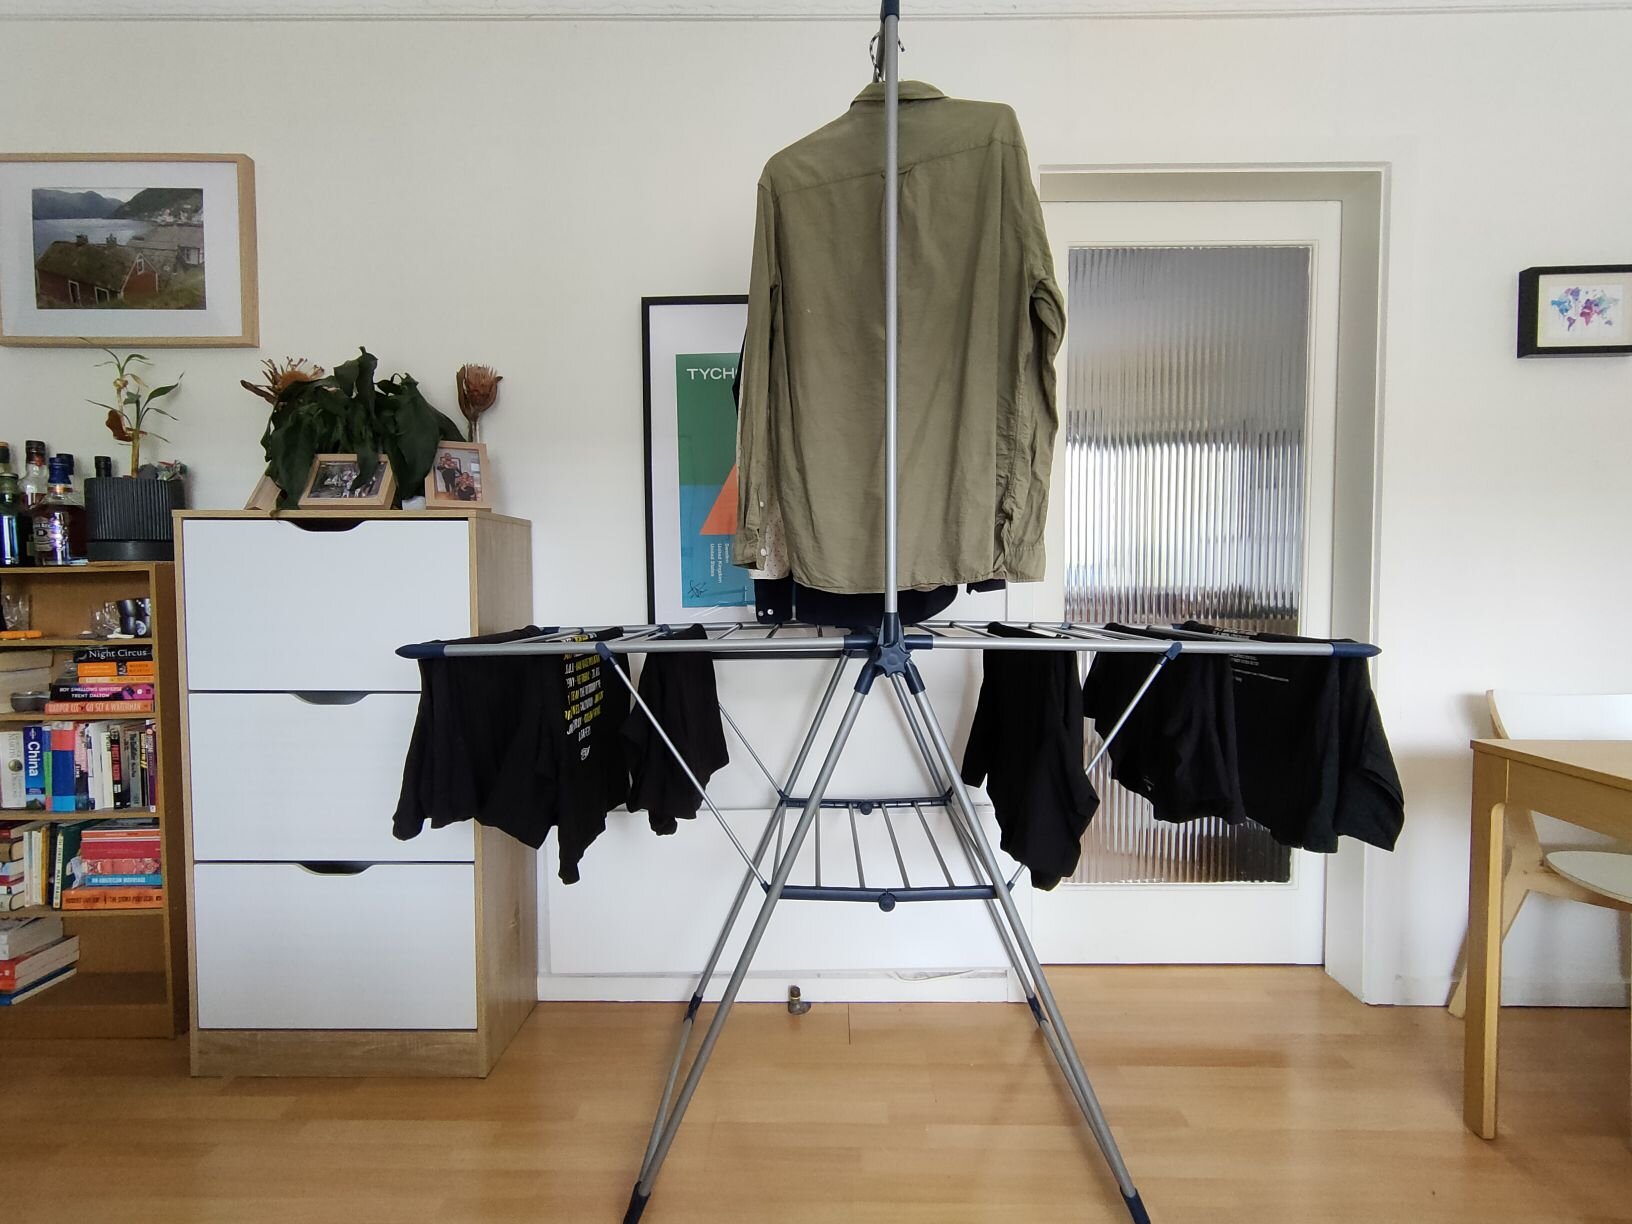
Original clothes airer
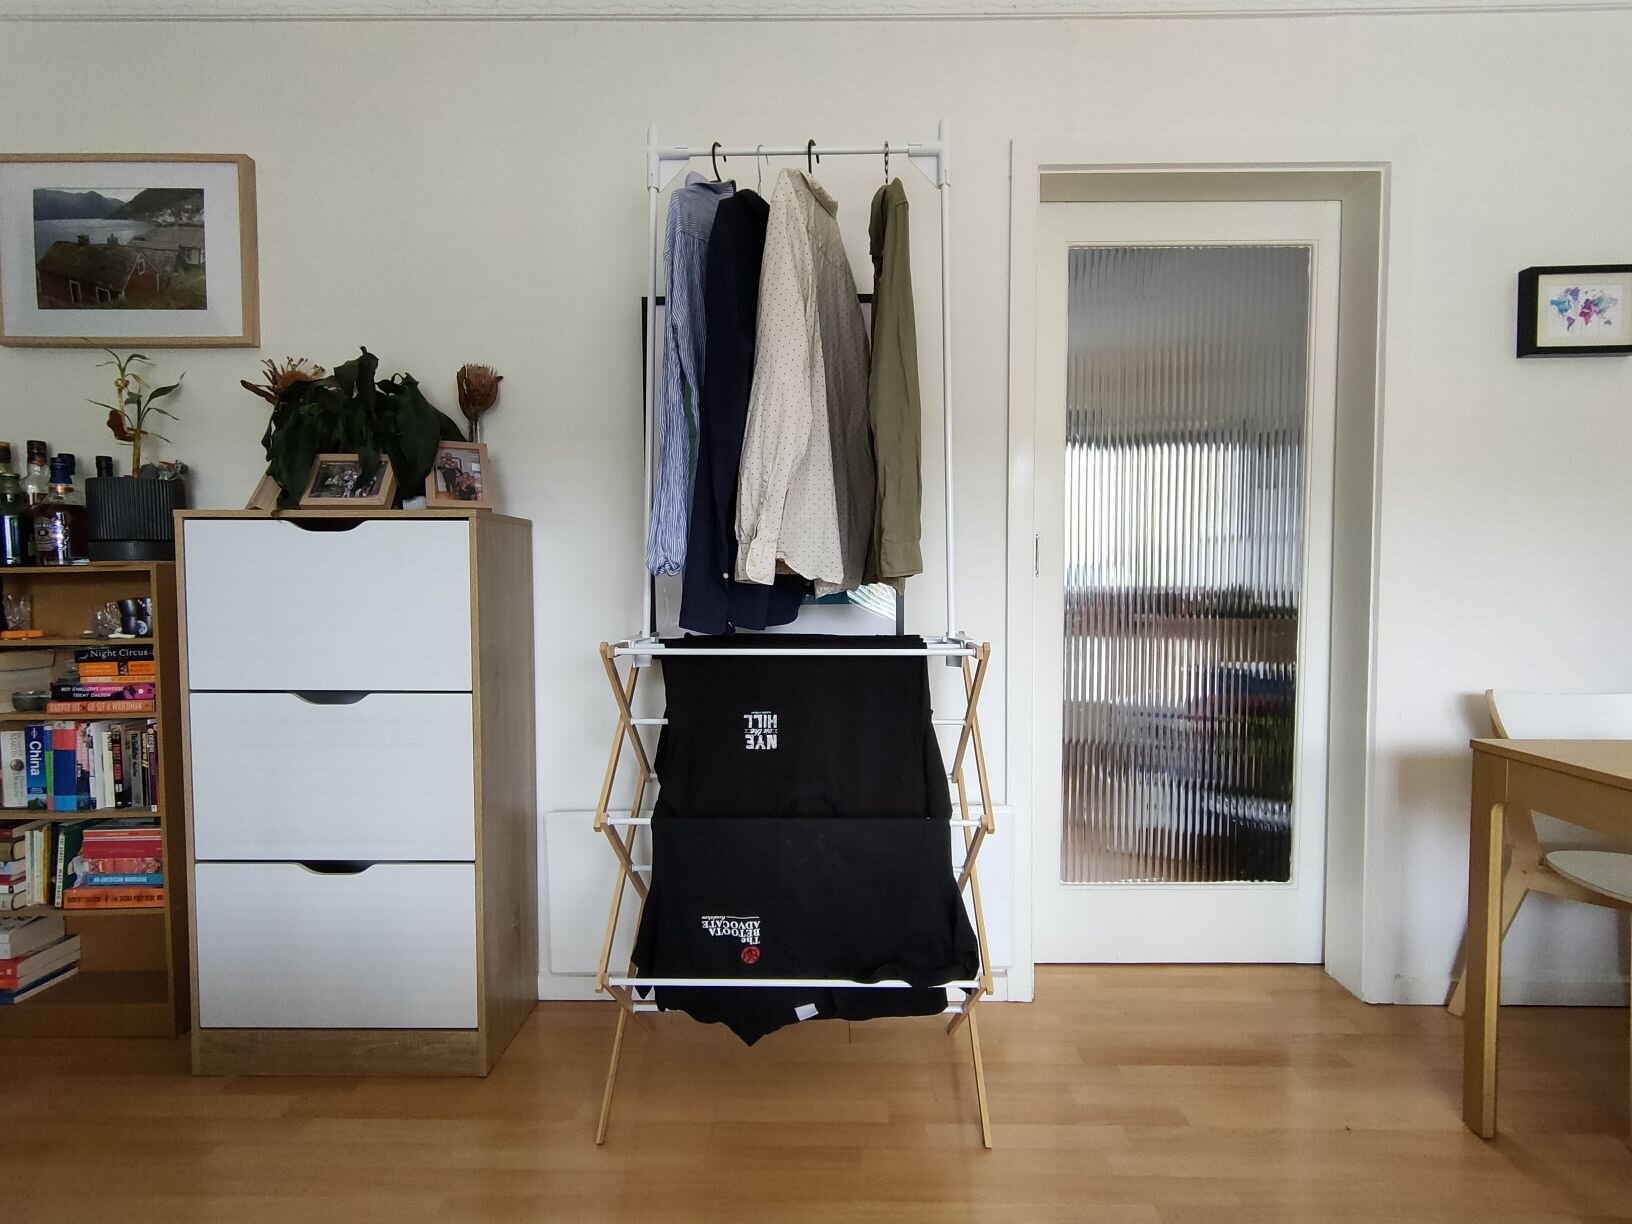
New airer with added hanger
The extension was design to be printed in place, without support and for a tool-less assembly. As a result, there are only two different components to print (the corner should be mirrored) along with some white powder coated curtain rail for the two uprights and hanging rail.
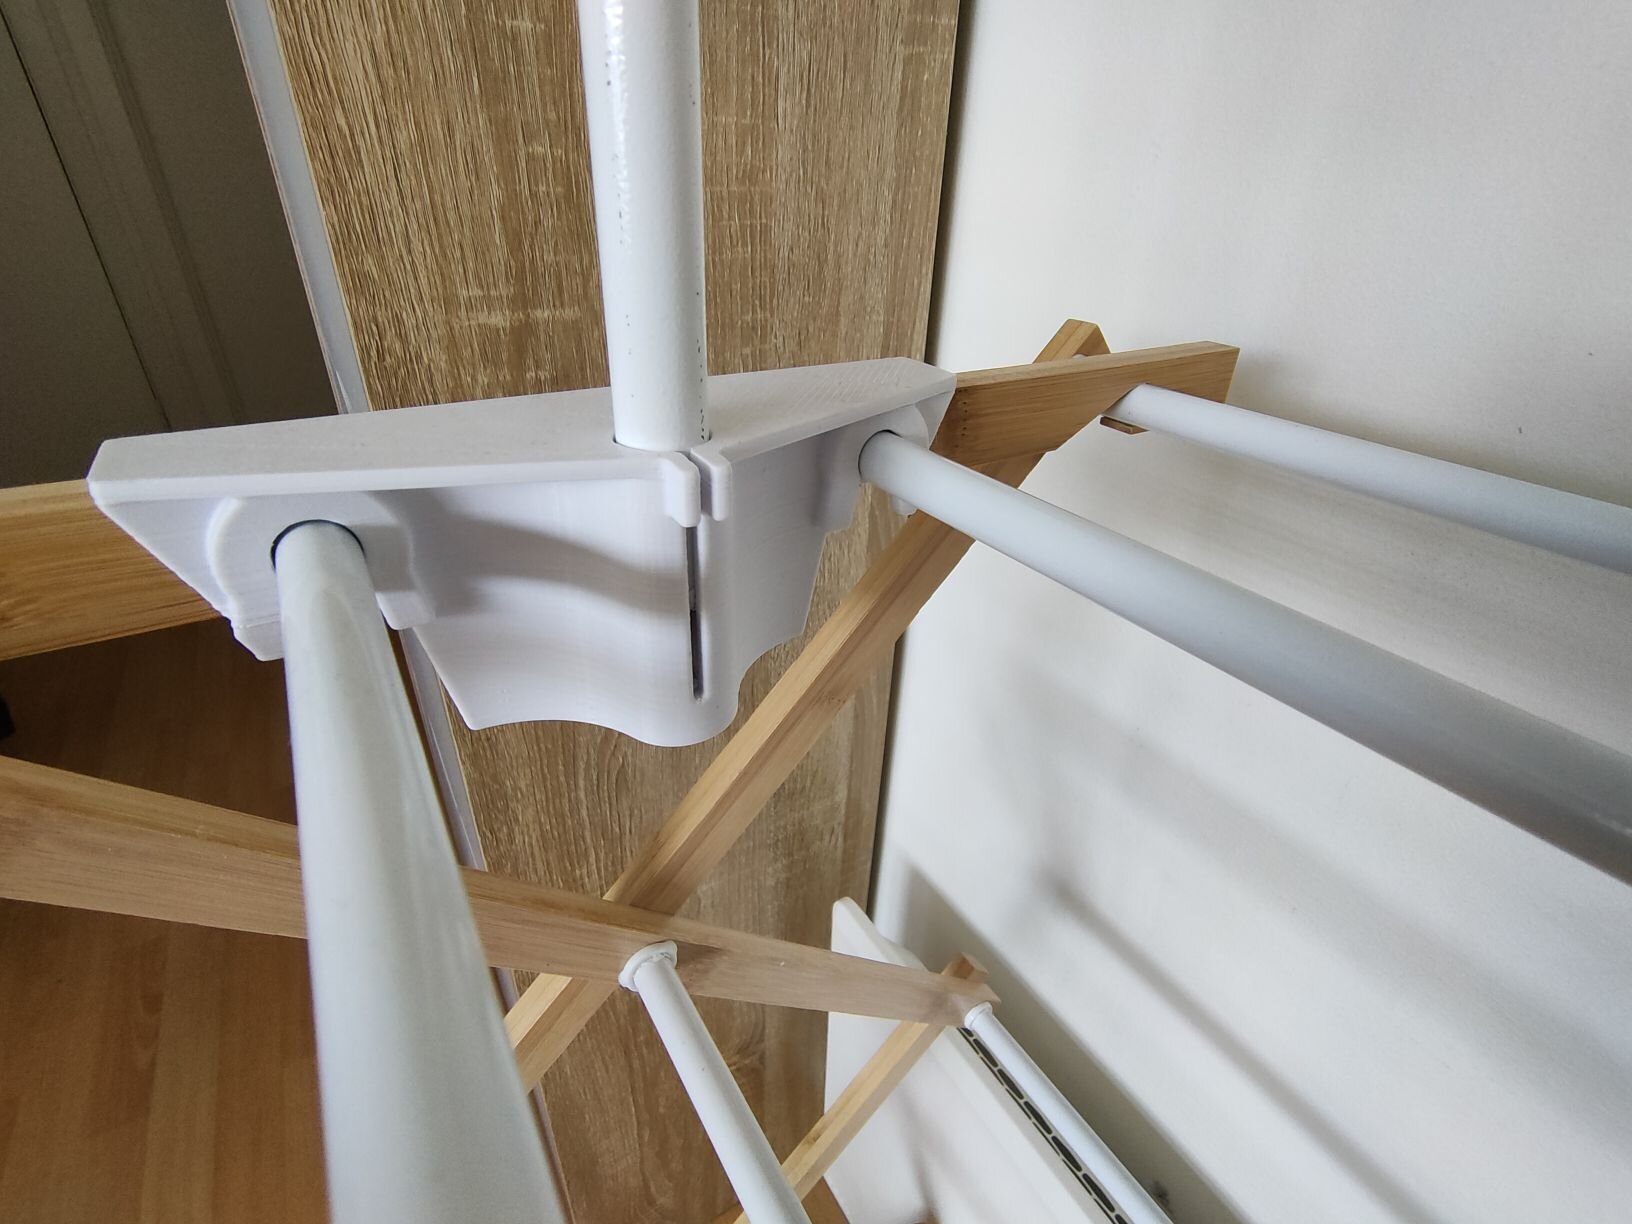
The bracket clips firmly over the two central rods.
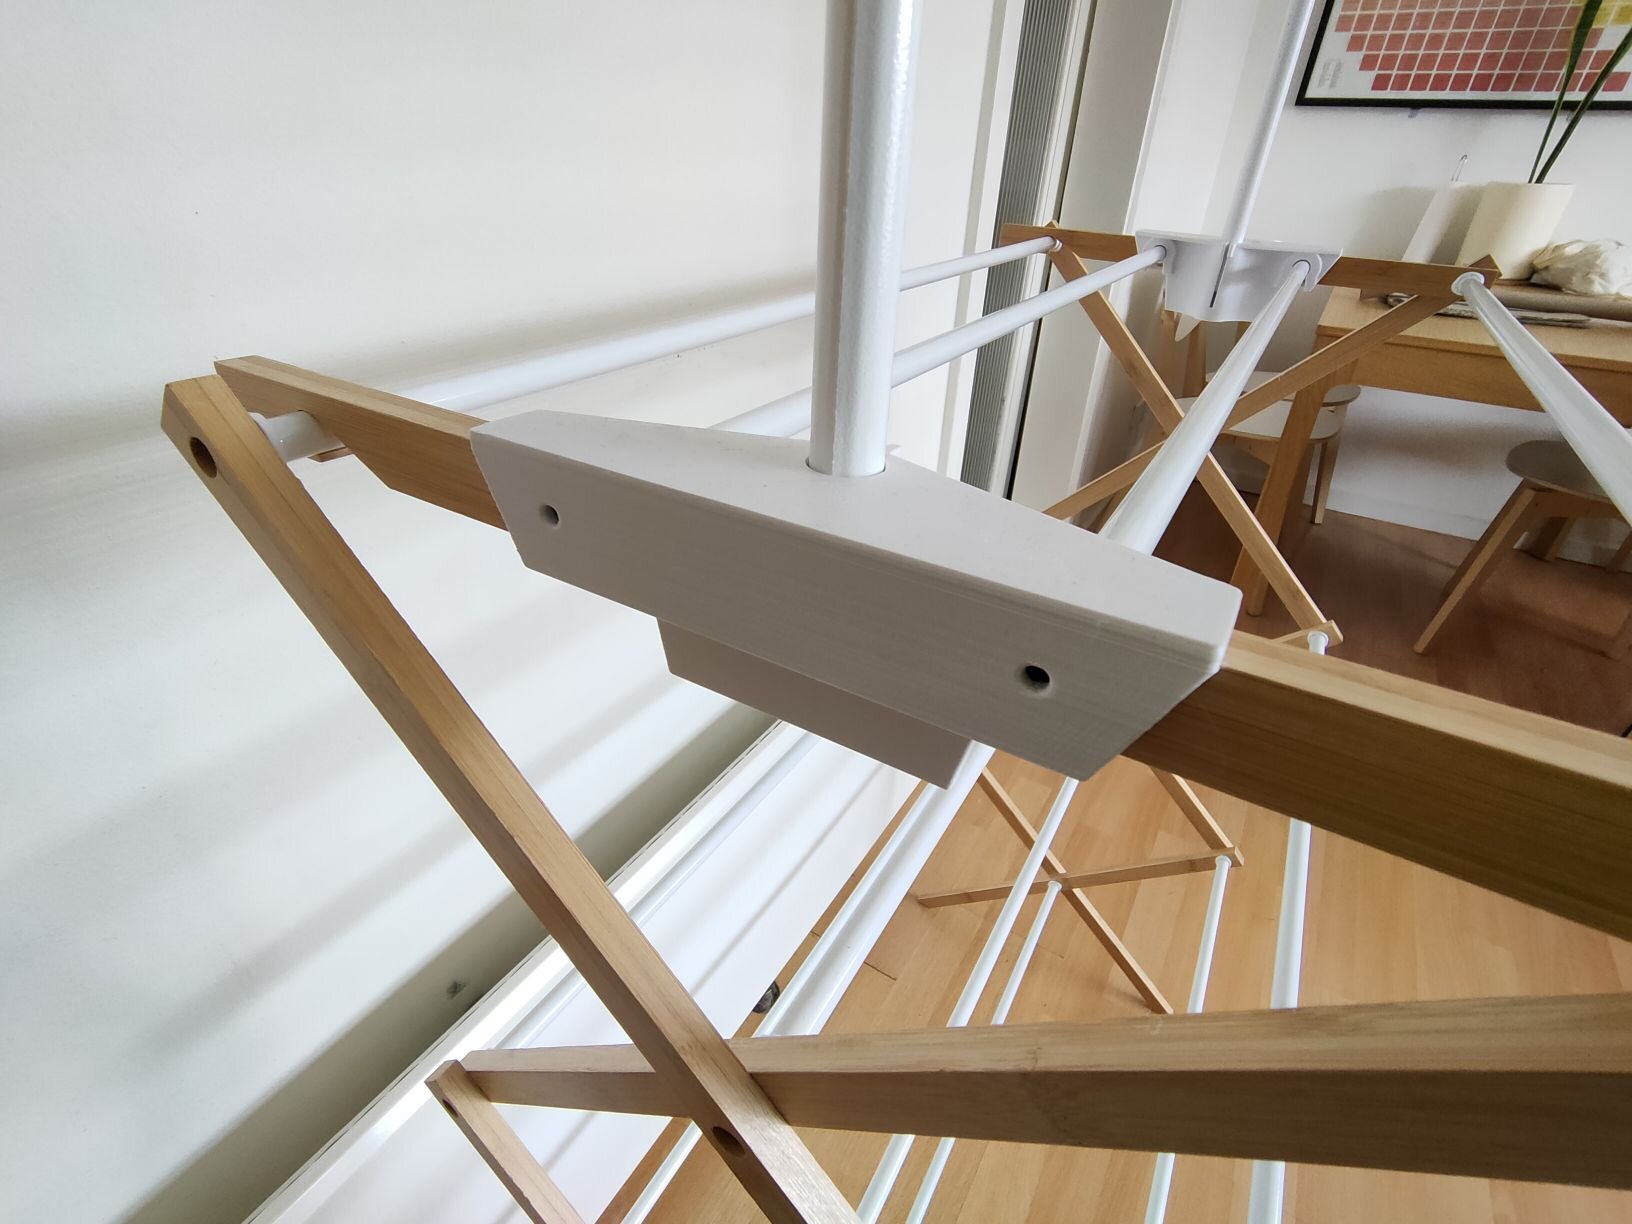
Screw holes are featured on the rear side in case a more permanent fixture is required.

The curtain rods push into the corner bracket with an interference fit. The fit could use some fine tuning, or can be improved by using tape or glue.
The final product goes together quickly and (relatively) easily:

